Author Archives: wpadmin
Password Resets
If you have forgotten your LabraNet password or otherwise want to change it remotely, you can use the LabraNet Self-service portal when the following applies:
- Your account is not disabled / locked
- You have access to your JAMK email account
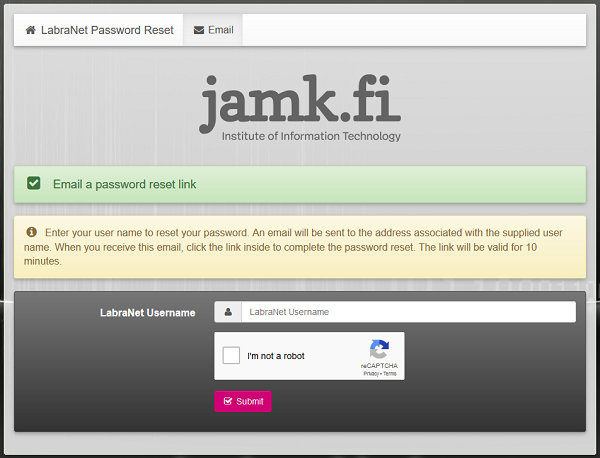
The Self-service portal can be found at:
student.labranet.jamk.fi/passwd/
By filling in your LabraNet username and reCAPTCHA, you can generate a password reset link which will be sent to your JAMK email account.
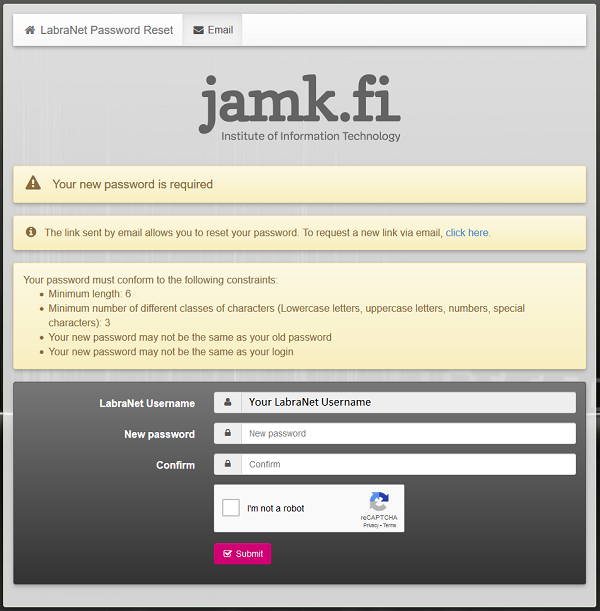
Opening the link from your email account will lead to a form with which the password change can be completed. Read the password requirements and fill in your new password twice and complete the reCAPTCHA. Click Submit to complete the password change.
Note!
- If you have forgotten your JAMK account password, you can reset it via JAMK password service
- The email link is only valid for 10 minutes
If the password reset fails or you have trouble with the service otherwise, please contact LabraNet helpdesk.
Windows 10 and LabraNet VPN issues
LabraNet users have stumbled upon an issue where LabraNet services seem unavailable when LabraNet VPN is connected. Services affected are at least:
- gitlab.labranet.jamk.fi
- helpdesk.labranet.jamk.fi
This issue causes name resolution to return an incorrect IP Address for forementioned services even when a full tunnel is forced. This is due to smart multi-homed name resolution and automatic interface metrics.
LabraNet VPN guide has been updated with step-by-step instructions on how to fix this. Read Windows 10 – Additional settings for more info if this is an issue for you.
LabraNet GitLab
GitLab is a web-based Git repository manager with additional features, such as wiki, issue-tracking and CI/CD pipelines. LabraNet Gitlab can be used by students to host their study related software development projects.
Logging into LabraNet GitLab
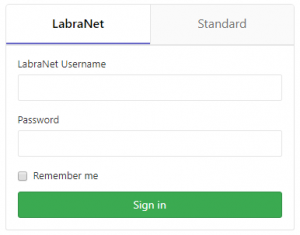
Users can use their LabraNet credentials to sign into the GitLab. If you don’t have a LabraNet account, see FAQ for more information. On the front page the LabraNet sign in-option has to be selected.
Backing up projects
Individual projects are not backed up, so users are responsible to keep backup copies of their projects. Repository contents can be backed up cloning the repository. The entire project, including wiki, issues and settings can also be exported.
Missing programs and features on classroom machines
We have noticed numerous issues on the classroom workstations regarding Start menu and some applications. Common issues currently occurring are:
- Cannot see any programs on Start menu or Desktop
- Cannot use search features
- Cannot open Windows 10 native applications such as calculator
We are currently investigating these issues. In the meantime, one can use the Programs -shortcut on the desktop to access software:
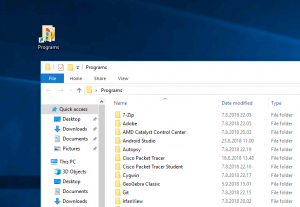
If even the Programs -shortcut is missing from the Desktop, software can be found in C:\Program Files or C:\Program Files (x86) -folders manually.
On new installations, waiting for a period of time (15 minutes) and signing out/in can help also.
SSH to Student Server
For connecting to Student server you can use what ever SSH client, for example PuTTY.
First enter the address to Student server which is student.labranet.jamk.fi (see figure 1).
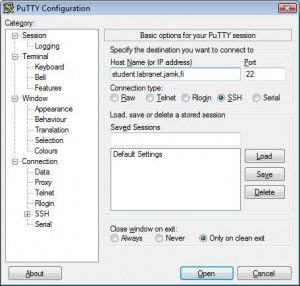
Figure 1. PuTTY startup screen
Then PuTTY asks login ID and password. Use your LabraNet account’s ID and password (see figure 2). Capitalize the first letter of your student id when logging to student via SSH.
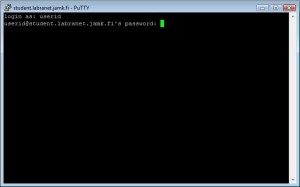
Figure 2. PuTTY login screen
After successful login you are in Student server (see figure 3).
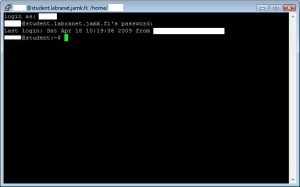
Figure 3. PuTTY logged in to Student server
SFTP connection to Student server
LabraNet users can use WinSCP SFTP client to remote access their LabraNet home folder. The WinSCP client can freely downloaded from http://winscp.net/
Download and install the client. Choose Start -> Programs -> WinSCP -> WinSCP
Once the program starts you need to enter the address to Student server which is student.labranet.jamk.fi.
After that you need to enter your LabraNet UserID and password. Port number is 22 (see figure 4).
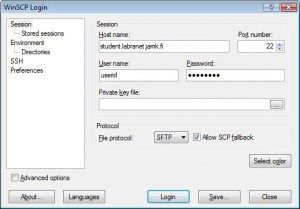
Figure 4. WinSCP startup
Your local files are in the left window of the client and the remote files (your home folder on Student server) are in the right (see figure 5).
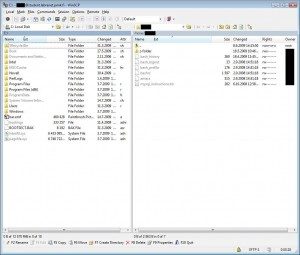
Figure 5. WinSCP connected to Student server
You can transfer files by dragging them from window to another.

